

Did you know that stereo headphones for personal music listening, were invented right here in Wisconsin? In 1958, John C. Koss, and engineer Martin Lange, Jr. invented the Koss SP/3, as an accessory to a new stereo portable record player. The headphones were a smash hit, and proved more popular than the record player!
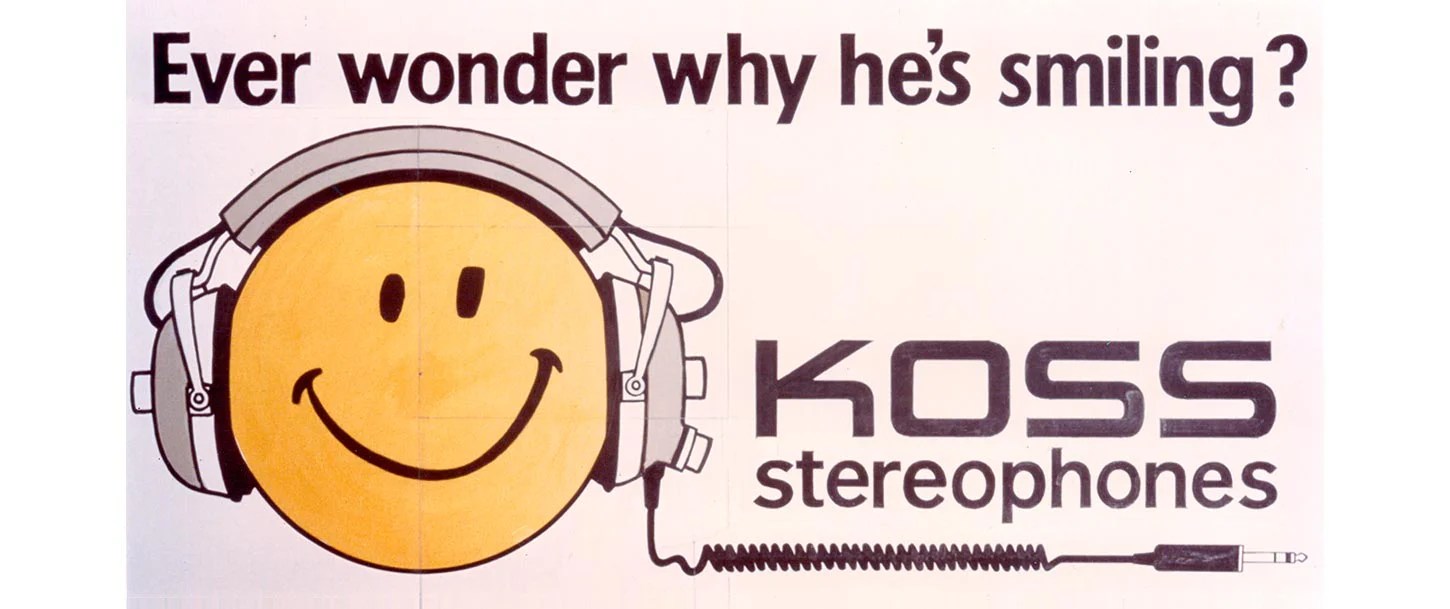
If you lived in Milwaukee, you’ll remember these billboards along the highway.
The Koss SP/3 is the ancestor of all your headphones. The headband is obviously repurposed from existing dual-headphone designs that, until now, were used in dual-mono for telephone operators, pilots, and other utilitarian purposes. These older types of headsets used carbon-crystal transducers, and sounded tinny and thin; they were not meant for music listening. (Though they were used in movie and music production for monitoring.) Koss’s innovation was to use newly-available dynamic transistor radio speakers in the headphones, instead of carbon transducers, which gave better bass and treble response and a smoother sound.


People started to listen to music IN HEADPHONES. IN STEREO. This was a new experience in 1958!

Koss did incredibly well in the headphone business. (hand-wave) Skipping ahead to 1970, Koss introduced the Pro4/AA, and more terrible puns. I love terrible puns.

The Pro 4/AA sold millions, and was—for a time—the #1 best-selling audio product in the world! Popular with audio enthusiasts, radio stations and recording studios. They are famously indestructible, the frame is made of very hard stainless spring-steel.
I found a near-mint pair at the thrift store for $5. Basically unused. Score! There are lots of these out there, so it’s easy to find them in excellent condition.
BASS becomes a BIG DEAL in the 80’s:
Up to the 70’s, if you wanted good bass in your headphones, the only option was big headphones like the Koss Pro4/AA, or similar from Pickering, Pioneer, Sansui, Kenwood and other hi-fi brands.
Good bass in a speaker or headphone requires a powerful magnet. Ceramic magnets at the time, were large, heavy and not all that strong.
For the Sony Walkman to become a runaway success, it needed—obviously—a small cassette tape mechanism. But just as importantly, it needed small headphones with good bass.

Enter the Neodymium magnet. Far smaller and more powerful than ceramic magnets. These became cheap enough to put in consumer products in the late 70’s. (It should be said; Neodymium and other rare-earth elements are conflict minerals with an ugly history. Google it if you want to educate yourself.)

This powerful little magnet is how they got good bass out of the Walkman’s tiny, lightweight, on-ear headphones.
Now I’m getting to the point: The neodymium magnet, is why today’s headphones have such stronger bass than they used to. Any headphone from the 70’s or earlier is going to sound pretty thin by modern tastes, and the Koss Pro4/AA is no exception.
The Koss gets an update:
I chose the Tymphany HPD-40N16PET00-32 for this project.

This driver is popular among headphone DIY’ers and gives excellent results. Only $7! Amazing. (Much of the cost of headphones is in the enclosure, not the driver.) There are more expensive drivers out there, but with the fantastic results I got, I don’t see any reason to change it! The overall sound of a headphone depends on the driver, but also has a lot to do with it’s enclosure. This driver happens to work out extremely well with the very large Koss enclosures… the big earcups, big earpads, the acoustic fill treatments and aperiodic damping… The bass is wonderful; Deep, articulate and punchy without muddying up everything else. Frequency response tracks the Harman preference curve pretty dang well. It’s just a great sounding combination overall, and perfect for the application as a DJ-specific headphone.
The Build:
Here are the original drivers. There is some foam damping material that has deteriorated, and the voice coils have detached. Also there is some deteriorated tuning foam. So even if the original drivers work, they will not sound the same.


The Pro4/AA has really BIG earcups, and I found these earpads that fit perfectly. Also available on Aliexpress here. They are SUPER thick and soft, and thicker in the back. This makes for a tight seal and incredible isolation, which is great for DJs. You can barely hear the house system or monitors with these on! I like to mix completely in headphones. It helps me keep the tonal balance right; it’s like a reference monitor. I know what the headphones sound like and I’m used to it, whereas if you rely on the house DJ booth monitoring system…. Every monitoring system sounds different.
Also the massive isolation means I don’t need to have the volume cranked up to hear my cueing over the PA system, saving my ears. It’s absolutely shocking how loud many DJs run their headphones!

Note: Avoid the 1988 re-release version of the Pro4/AA. They are smaller and not the same headphone! Avoid. I think the way you can tell them apart, is that the new version has a molded plastic 1/4″ plug, has a faceted look on the microphone attachment knob, and sometimes does not have the chrome on the sides. I would avoid these newer, smaller models for restoration projects; the large size of the original is a good thing.
Stainless steel and you:
The brushed stainless steel headband may be a little tarnished by now. The finish can be restored by sanding it with 220-grit, and buffing with fine steel wool. You can’t get at the area around the pins, so I actually punch out the pins before sanding the arms. It’s tricky to get the sanding marks in straight lines.
Update 2025.05.16 I’ve learned that the usual way to get this kind of brushed-stainless look, is the use of a “Surface Conditioning” abrasive wheel, mounted to an angle die grinder. It needs to be a mandrel/wheel type, not a disc. The disc will leave curved scratch marks, while the mandrel wheel type makes straight-lines. Harbor Freight has this kit and the grey 240-grit wheel makes the perfect finish!

On the left, untreated, on the right, sanded and buffed.

The pins now need to be replaced, and I use these press-fit studs from McMaster. They tap in with a hammer, and I use a little JB-weld in the joint just to be sure. The receiving holes in the earcups then need to be enlarged to about 5.3mm. Use multiple drill bits to gradually step up to 5.3mm so it doesn’t split the plastic.
Headband pad:
The headband had a neoprene pad that was deteriorated. I happened to have some 6mm thick self-adhesive silicone foam. Perfect! I got it at Ax-Man Surplus in Minneapolis, apparently it’s quite expensive stuff new, so not sure what else to recommend for this. McMaster Carr carries Silicone and Neoprene foam with self-adhesive backing.

This spikey little guy is what keeps the PVC headband centered.

The cable runs in a groove behind the headband.
The plastic clips that keep the end-caps attached are usually snapped off.

The fix is to install two #4 x 1/2″ sheet-metal screws.

Earpads and the mounting ring:
Some plastic needs to be removed from the frame to allow the back of the baffle plate to fit snug against it, and seal the cavity. Unfortunately this means that the earpads cannot be changed without taking the earcup apart. The earpads are pinched beneath this trim ring. I could not find earpads that I liked that would fit any other way, so this is a reasonable compromise. This is perhaps the only down-side to these headphones compared to popular offerings, whose earpads are easy to change by the customer. For this reason, I will offer to change customer earpads for a flat-rate of $30+shipping. For as long as you can find me, and I can still operate a screwdriver. I have stocked up on the pads so I have enough in perpetuity, and they’re kept in the deep freezer so they don’t age. I feel that these particular earpads are crucial to the great sound of these headphones. Unusually, they are thicker in the back, which keeps the headphone from pressing on the back of your ear. And I have mounted the driver at an angle to compliment the angled pad. The drivers hovers a few mm over the ear, and the ear itself is mostly untouched. The clamping force is quite firm, but since there is no pressure on the outer ear, they are very comfy and cozy to wear.

Wiring inside the earcup.

I’m using super-flexible 8-core headphone wire, commonly available on Aliexpress or Amazon or wherever. It comes in lots of fun colors.
A 40mm hole is cut for the new drivers.
Six 1/4″ holes are drilled around the perimeter, and a plug of soft felt is glued into each one. This provides a little pressure relief without letting sound just leak through. It also provides a little aperiodic damping in the low bass region.

Enclosure resonance damping:
The earcups kind of ring like a bell if you tap them with your fingernail. A sort of “pok pok!” sound. This resonant frequency can affect the response of the headphones. It’s analogous to speaker-cabinet panel vibration. I applied some viscous damping sheet to the backs of the cups. I don’t trust the adhesive backing to last forever, so I stuck them face-down with plastic epoxy instead. Now, tapping on the cups produces a dull thud.

Acoustic stuffing:
The goal here is to simply absorb as much rear-radiated sound as possible, so that reflections and resonances do not reflect back out through the driver diaphragm. This absorption must not cause too much airflow restriction; it must not be packed so tightly that it causes an apparent reduction in the enclosure volume as seen by the driver. I used two layers of 1/4″ low-density natural wool felt F26 grade, which has excellent acoustic absorption properties across a wide bandwidth. (Wool’s acoustic absorption is enhanced by microscopic hooks on the wool fibers, which is also what allows wool to felt.)


Strain relief:
The body of a 1/4″ plug is used as a strain relief. A section of hollow 10mm threaded rod is harvested from an old binding post.


Installing the drivers to the baffles:
The drivers and 42mm grilles: First, the grilles are glued to the drivers with just three dabs of epoxy; just to hold it in place. More epoxy will be added to support it later.

The drivers need to be elevated a bit, and angled, because the earpads are very deep and thick. This holds the driver so it hovers just over the ear without touching.
Temporary positioning: I cut a piece of bamboo skewer to 11mm to hold it at the right angle and super-glued it in place. Then, some sheet aluminum to fill the gaps in the side. This is just to hold the driver in the perfect position for the next step.

PC7 epoxy paste is used to form the driver mounting bezel. This stuff has the consistency of modeling clay, and the bezel is simply formed by hand.

After curing, finished bezels.

The pads are installed, and holes melted for the screws to go through.

Not shown; The screws need to penetrate the cloth lining on the inside, so to prevent tearing, I melt holes in the cloth lining to match up with the holes melted in the pleather. After the holes in the pleather are made, the pad is removed again, and a soldering iron is then used to poke cauterized holes through the fabric lining. A coin is placed between the back of the pad and the hole to keep it from burning the pad.
The screws are a little too long now because of the material trimmed off the frame, so these aluminum spacers are installed. This also acts as a washer so the screw doesn’t twist the cloth.

Or, just use new, shorter screws and a washer. #4 x 7/8″ from McMaster Carr. And this thin brass washer.

The driver is wired up. Half a gram of natural wool is shredded and fluffed and stuffed behind the driver. Very light and fluffy, it should not stop the sound from reaching the denser wool felt behind it, but let it pass through while absorbing some of it, and lowering the Q factor of any resonances. Basically, trying to make the enclosure act as close to an open-baffle as possible.

Done!

The sound:
Said one friend “WHOA! These headphones KICK!”
The bass punches hard without getting muddy. Very clear and spacious sound. I think the fact that they put no pressure on your ears makes a big difference to the sense of spaciousness.
They sound pretty similar to a studio-monitor type headphone like the Sony MDR-7506 or Audio Technica ATH-M50x, except more and deeper bass! They have more bass than you would normally want in a studio headphones, but these aren’t studio headphones, they’re DJ headphones! So actually… DJ headphones should be a little boosted in the bass, because that is what the audience is hearing. Clubbing is a bass-heavy experience and so are these headphones. DJs need to really hear that bass pulse in the headphones, especially over the noise of the PA and monitor speaker systems.
And they have a really nice tonal balance, with nothing missing. DJs are constantly tweaking the bass, mid and treble knobs of their mixers, and they need to be able to hear what they’re doing! I’m finding it really easy to mix on these!
And the style! So big! So beige! So 70s!
Most headphones are just boring black plastic, absolutely forgettable. To the club-goer, they are all the same.
Here’s my friend making the Koss look better than I can.

And Herr Mozart is really diggin’ it!


Want your own pair of custom Koss Pro 4AA?
They are $550, and come with a flat-rate repair warranty. Absolutely everything about these headphones is repairable, and I have spare parts. All repairs are a flat-rate $100+shipping, no matter what’s wrong with them. They will be in perfect working order when you get them back.
Earpad changes are $30+shipping. The earpads are unfortunately not user-serviceable. This is IMO the only negative feature to these headphones, but it was a necessary compromise to utilize these particular earpads that just happen to work out amazingly.
But I’m happy to do it for you. It is not difficult, the process is described above. But it’s a little tricky and fussy, and yeah just send them to me!
Update! 2025.1.13
Some improvements:
I like this headphone jack better, it’s chonkier and looks more period-correct.

The 1/4″ to 1/8″ adapter stores here! Never lose that dang adapter again. The holder is made from an old 1/4″ jack.

Another cool feature; A strain-relief made from bungee cord and a short loop of cable. This prevents damage to the cord as well as the mixer it’s plugged into. There will be accidents in the DJ booth.

Parts:
- Elastic Cord Abrasion-Resistant, 1/8″ Diameter
- Junk-box headphone jack
- Self-sealing silicone tape and heatshrink
And one final detail: The rivet holding the earcup forks to the headband is replaced with a bolt, washers, an acorn nut, and a jam-nut. This is adjusted precisely so that there is very little slack or wobbling.

The hole in the headband must be enlarged to 4.9mm, to fit the M5 bolt with no slack. The stainless steel is very, very hard so a tungsten-carbide drill bit is required. Or, you can just burn up a few cobalt bits in the process of drilling the holes. I tried titanium-coated HSS bits, and they are useless on this steel, they just heat up and melt. Good steel!
Parts:
- 316 Stainless Steel Flanged Button Head Screw M5 x 0.80 mm Thread, 12mm Long
- 18-8 Stainless Steel Washer for M5 Screw Size, 5.3 mm ID, 10 mm OD
- 18-8 Stainless Steel Thin Hex Nut M5 x 0.8 mm Thread, DIN 439B, ISO 4035
- 18-8 Stainless Steel Cap Nut M5 x 0.8 mm Thread
Tools:
- 4.9mm tungsten-carbide drill bit.
Update: 2025.02.01 LOCKING HEADBAND!
OK, I am just too excited about this! Locking headband adjustment!

I was watching my friend play a DJ set, and noticed them struggling to adjust the headband every time they put the headphones on. This is distracting while trying to play!
So I thought, “Why not do it like aviation headsets?” There is a locking bolt on the slider. The Koss is constructed much the same, but with a sliding rivet where that bolt is.

I used a thumbwheel instead of a hex-nut, so it is easy to adjust while they’re on your head.

Why are there no other DJ headphones with this feature?? DJs are constantly putting their headphones on and taking them off again, and constantly messing with the headband.
Here’s how to do it:
Drill out the riveted headband sliders, they will be replaced with the lock-bolt assembly. Enlarge the hole to 4.9mm to accommodate the #10-32 bolt. The stainless steel is extremely hard, so a tungsten-carbide bit is recommended.
A 3/8″ forstner bit cuts a nice clean hole in the PVC headband. First, create a pilot hole; Install the steel headband to the vinyl cover, and with a very small bit, drill through the bolt hole from the inside, and it will make a small pilot hole for the forstner bit.

The hole is cleaned up with a sharp chisel. There is a groove along the back, where the right-channel signal wire feeds through. This wire needs to be routed around the lock-bolt assembly. Some material is removed from around the bolt hole.

Shrink-wrap goes around the signal wire, and it’s bent to shape. A square washer made of thin sheet aluminum covers over the curve in the wire, and keeps it from being abraded by the slider.

The bolt is installed.

The spacer and thumb-nut go on. If you look closely, you can see I’ve intentionally crushed a few threads with a pliers so the thumb-nut does not come off.
Parts:
- Extra-Wide Truss Head Phillips Screws Passivated 18-8 Stainless Steel, 10-32 Thread, 7/8″ Long
- 18-8 Stainless Steel Unthreaded Spacer 5/16″ OD, 11/32″ Long, for Number 10 Screw Size
- 18-8 Stainless Steel Flanged Knurled-Head Thumb Nut 10-32 Thread Size
Tools:
- 4.9mm tungsten-carbide drill bit. (The stainless steel is extremely hard.)
- 3/8″ Forstner bit
Here’s more detail on that cable routing. It’s held in place with a short section of adhesive-lined shrink tube. (3M EPS300) There is enough slack in the cable for the earcup to rotate 180 degrees without pulling.

Oh, what’s that knob for?

A boom-mounted microphone! The go-to mic for this application is the Shure SM-10A, available used for about $70. Shure even has a technical bulletin on how to do it. If you want a Shure SM-10A for your headphones, I can fix one up for you for hourly labor charge. Terminated with a nice XLR.

Update: 2025.02.07 MEASUREMENTS!
I love the sound of these headphones, but until now I didn’t have any actual test data to back up my assertions! Now that I’ve made some actual measurements, I’m happy to report they affirm what I thought I was hearing! I thought they sounded a lot like the venerable Sony MDR-V7506, but with a bit more bass and not so tizzy up high.
I don’t have a standard headphone test fixture, but I do have a head!
This is a Panasonic WM-61 omni-directional mic capsule, embedded in a foam earplug. It fits into the ear canal, and turns a human head into a headphone test measurement fixture! (Or a binaural microphone, which can be used to make field recordings, which is what I made these for in the first place.)

So here’s what I get in REW!
CAVEAT: This is not a standardized test setup, though my results seem to correlate well with others.
Also note that headphone are not supposed to measure “flat” like speakers, since the experience of listening to headphones is very different from speakers. A good discussion on headphone “target curves” is here and here.
KOSS PRO 4AA with HPD-40N16PET00-32 in Yellow versus Sony MDR-V7506 in Red. Normalized around 1KHz.

Both phones exhibit a midbass droop around 200-300Hz, probably do to a resonance correlating to the volume inside the earcup. The Koss’s droop is less severe. Again, this is not a properly calibrated measurement rig, and these results are shown in comparison to the Sony, not for absolute accuracy.
The MDR-V7506 is known to be a little bright, and so I’m delighted to see the Koss following the Sony’s response pretty closely, but just a bit less bright. This correlates with what I’m hearing. Overall, the Koss’s response compared to the Sony can be viewed as tilted up in the bass and down in the treble, but otherwise quite similar.
Here’s the 1/3 octave smoothed view. Deep nulls in the un-smoothed response are normal, and are usually caused by standing waves that depend on the earcup geometry, and the way that they happen to sit on the ears. If one moves the headphone just slightly and measures again, the nulls move around too. Psycho-acoustically, these nulls are partially compensated by your brain. The smoothed graph is a bit more like what you actually hear.

In conclusion; This is EXCELLENT. :^D
Now in BLACK! Too coooool!

These beauties are Koss Pro/5LC, and are basically the same headphone as the Pro/4AA. The Pro5/LC has a squared-off earcup instead of domed, and features level-control dials along the bottom edge. (Thus Pro5/LC) I removed the dials and filled the gap with epoxy putty and painted it to match. It’s hardly visible.
Yes, they are for sale, and yes they are expensive! They are labor-intensive, and I do meticulous work.
They come with lifetime earpad replacement for $30, and a $100 flat-rate repair warranty. No matter the issue, they will be returned in perfect working order; same as Koss’s original, legendary warranty service.
Followup December 2025: Durability!
My dear friend DJ Certified Scruffian is a hard-working DJ in Chicago, and is my field tester for these headphones. After a whole year of use, they’re still perfect, and have required no maintenance! They get a lot of compliments on them.

It seems wonderfull equipment for dj. The only thing is that the price ! Did it really better than onther one ?
Well yes, I think they are! I cannot compete on price with major brands; these are hand-made boutique items.
1. They are hand made, and guaranteed
2. They are repairable.
3. They sound amazing. (Unfortunately I can only demonstrate this in person, but I am getting great feedback from everyone who has tried them.)
4. The sound isolation is far greater than any popular DJ headphone.
5. Style! This is not to be underestimated. Style is important to many DJs including myself, and most headphones have no style at all.
So I will get one and test it 😜 Many thanks for this experience and details
Koss headphones are known for their excellent sound quality, affordability, and durable designs. Personally, I use the KOS PRO4-S and they’re wonderful headphones.
Many many thanks for this article, this presentation and theses tests …